You love your open-concept kitchen—the airy flow, the natural light, the way you can chat with guests while prepping dinner.
But here’s the problem: where exactly does the kitchen end and the dining area begin? Without walls to define zones, your beautiful open space can feel like one giant, undefined room.
That’s where a dedicated breakfast area changes everything.
A well-designed breakfast nook doesn’t just give you a place to enjoy your morning coffee. It creates structure in your open floor plan, adds instant charm, and makes your entire kitchen feel more intentional and put-together.
The best part? You don’t need a contractor, a massive budget, or even to own your home to pull this off.
I’m sharing 15 actionable breakfast area ideas that work for renters and homeowners alike. You’ll discover how to carve out a cozy, functional breakfast spot using furniture you can find secondhand, lighting tricks that define zones instantly, and clever design elements that cost less than a fancy dinner out. Whether you’re working with a tiny corner or a sprawling open layout, these strategies will help you create a stunning breakfast nook without breaking the bank or knocking down a single wall.
Let’s transform that undefined kitchen space into your new favorite spot in the house.
Corner Breakfast Nooks: Maximizing Every Inch
Corners are the unsung heroes of open kitchens. That awkward L-shaped space everyone walks past? It’s actually prime real estate for a breakfast area that feels intentional and cozy.
Built-In Banquette Seating (Budget-Friendly DIY Version)
You’ve seen those gorgeous built-in banquettes on Pinterest with custom cushions and hidden storage underneath. They look expensive because they usually are—contractors charge thousands for custom millwork. But here’s the secret: you can fake the entire look with freestanding furniture.
Start with two or three storage benches from IKEA, Target, or even Facebook Marketplace. Position them in an L-shape in your corner, leaving space for a table. Add a plush cushion that spans the length (you can have fabric stores cut foam to size for under $100), then pile on throw pillows in coordinating patterns. Nobody will know this isn’t a $3,000 custom build.
The storage bonus? Those benches hold everything from extra kitchen linens to your stand mixer. If you’re renting, this setup moves with you—no permanent changes, no lost security deposits.
L-Shaped Bench with Round Table
Here’s something most people get wrong: they shove a rectangular table into a corner breakfast nook and wonder why it feels cramped. The issue isn’t the space—it’s the table shape.
Round tables are game-changers in tight corners. They eliminate sharp edges that bruise hips, they make conversation feel more intimate, and they simply fit better when you’re working with an L-shaped seating arrangement. Measure your corner carefully—you want at least 36 inches between the table edge and the wall for comfortable seating.
Thrift stores and estate sales are goldmines for affordable round tables. I’ve found solid wood pedestal tables for $50 that just needed a quick sanding and a coat of paint. Pair it with benches in a complementary finish, add coordinating cushions, and suddenly your breakfast nook looks curated and intentional rather than thrown together.
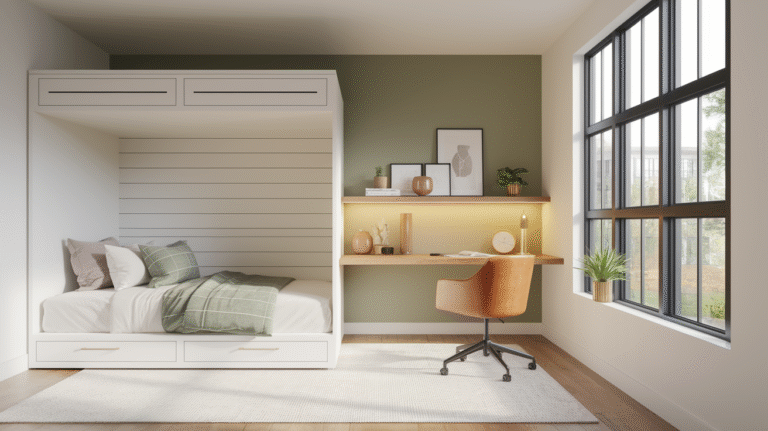
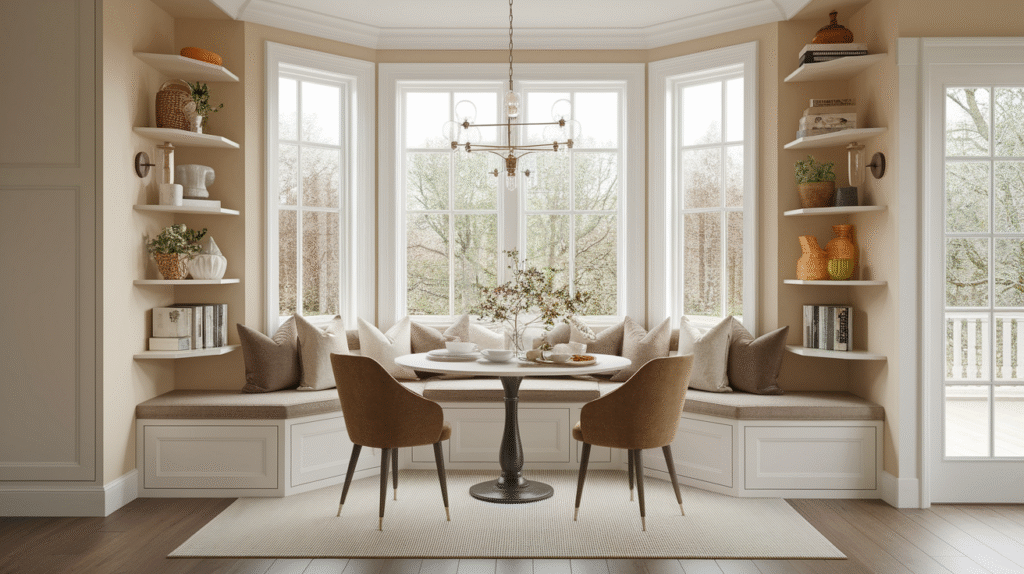
Window Corner Advantage
If you’re lucky enough to have a corner with windows, you’ve hit the breakfast nook jackpot. Natural light makes every meal feel special, and positioning your seating to face the view creates an instant focal point.
Keep window treatments simple and light-filtering. Heavy curtains block the precious sunlight you’re trying to capture. Instead, opt for linen cafe curtains, bamboo shades, or even leave the windows bare if privacy isn’t an issue. The goal is to maximize that natural light while maintaining the open, airy feel that makes your kitchen special in the first place.
Add a few potted herbs on the windowsill—basil, rosemary, thyme—and you’ve got functional decor that smells amazing and makes your breakfast area feel fresh and alive. This tiny detail costs under $15 but delivers serious visual impact.
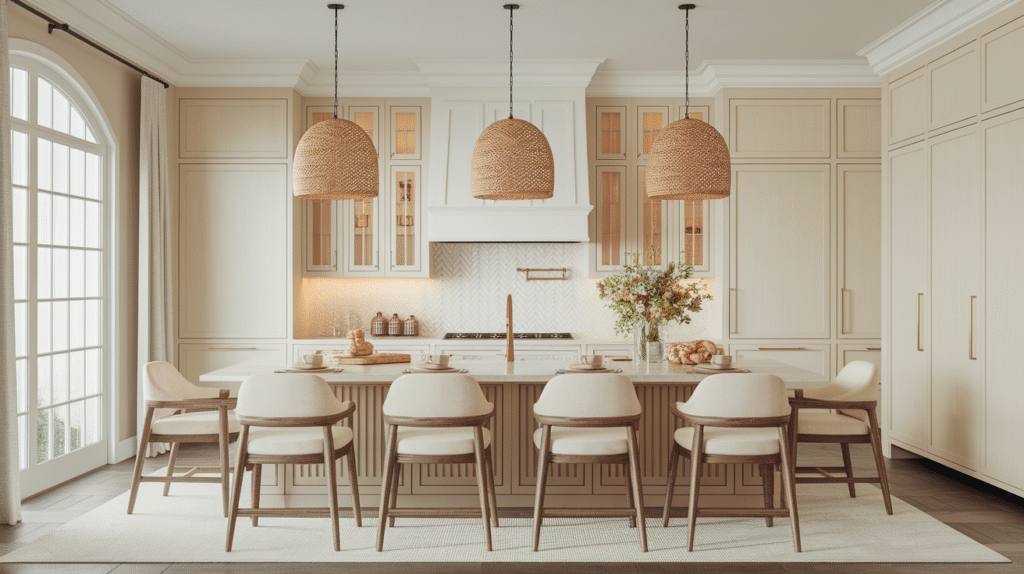
Island-Adjacent Breakfast Bars: Casual and Chic
Not every open kitchen has corner space to spare. If your layout revolves around a central island, you can create an effortless breakfast area right there—no additional furniture required.
Overhang Extensions for Counter Seating
The standard kitchen island overhang is 12 inches, which technically accommodates seating but feels tight. For comfortable breakfast bar seating, you want 15 inches of overhang minimum. This gives knees space and makes the experience actually enjoyable rather than awkward.
Bar stool selection matters more than you think. Measure from your floor to the underside of your counter overhang, then subtract 10-12 inches—that’s your ideal seat height. Counter-height islands (36 inches) need stools around 24-26 inches tall. Bar-height counters (42 inches) need 30-32 inch stools.
Budget-friendly doesn’t mean cheap-looking. Target’s threshold line, Amazon’s mid-century modern options, and even IKEA’s industrial-style stools look expensive when you choose finishes that coordinate with your kitchen hardware. Matte black, brushed brass, and natural wood tones work with virtually any style.
Renters, here’s your hack: if your island doesn’t have adequate overhang, position a narrow counter-height table perpendicular to the island. It creates the same breakfast bar effect while remaining completely portable.
Two-Tier Island Design Concept
The two-tier island trend separates cooking workspace from dining space—the lower level handles meal prep while the raised bar-height section provides seating. This design keeps cooking mess hidden from diners, which is brilliant for entertaining.
You can’t exactly renovate your existing island if you’re renting, but you can mimic the effect. Use a riser platform or even stacked cutting boards under placemats to create visual separation between the prep zone and eating area. It’s a subtle trick that signals “this side is for eating” without permanent changes.
For homeowners considering this renovation, the two-tier island costs more upfront but delivers serious functionality. Just ensure the raised section doesn’t block sight lines if maintaining that open-concept flow is important to you.
Backless vs. Backed Stools: Making the Right Choice
This decision impacts both comfort and visual flow. Backless stools maintain clean sight lines across your open space—nothing blocks the view from kitchen to living area. They tuck completely under the counter, saving space when not in use. The downside? Less comfortable for lingering over a long breakfast.
Backed stools (especially low-back or counter-height options) provide support without overwhelming the space. They invite people to sit longer, which is exactly what you want for a breakfast area. The trade-off is visual weight—they’re more noticeable and don’t disappear when not in use.
My recommendation? Mix them. Use backless stools on the kitchen-facing side where you want to preserve sight lines, and backed stools on the opposite side where comfort matters more. This collected look feels designer-approved and costs nothing extra to implement.
Freestanding Furniture Solutions: Flexibility Meets Function
If permanent changes aren’t an option—or if you want furniture that moves with you—freestanding pieces create instant breakfast areas with zero commitment.
Bistro Table and Chairs Set
Bistro sets are the secret weapon of small-space breakfast areas. These compact table-and-chair combinations fit in spaces you didn’t even realize you had—that gap between your island and the wall, the empty corner near your pantry, even a wide hallway adjacent to your kitchen.
The key is choosing a set that feels intentional rather than like patio furniture that wandered indoors. Look for bistro sets with finished wood, metal with interesting details, or even marble-topped tables that read as sophisticated rather than casual outdoor furniture.
Thrift stores and Facebook Marketplace overflow with bistro sets, often for $30-50. A can of spray paint transforms a basic set into something that looks custom. Matte black paint gives instant modern farmhouse vibes. Metallic gold or brass creates unexpected elegance. Even crisp white paint makes a tired set feel fresh and current.
Style your bistro set like you mean it: a small vase with fresh flowers, coordinating placemats, even a vintage tray holding salt, pepper, and a small plant. These finishing touches cost under $20 but make the difference between “furniture we stuck in a corner” and “charming breakfast nook we designed intentionally.”
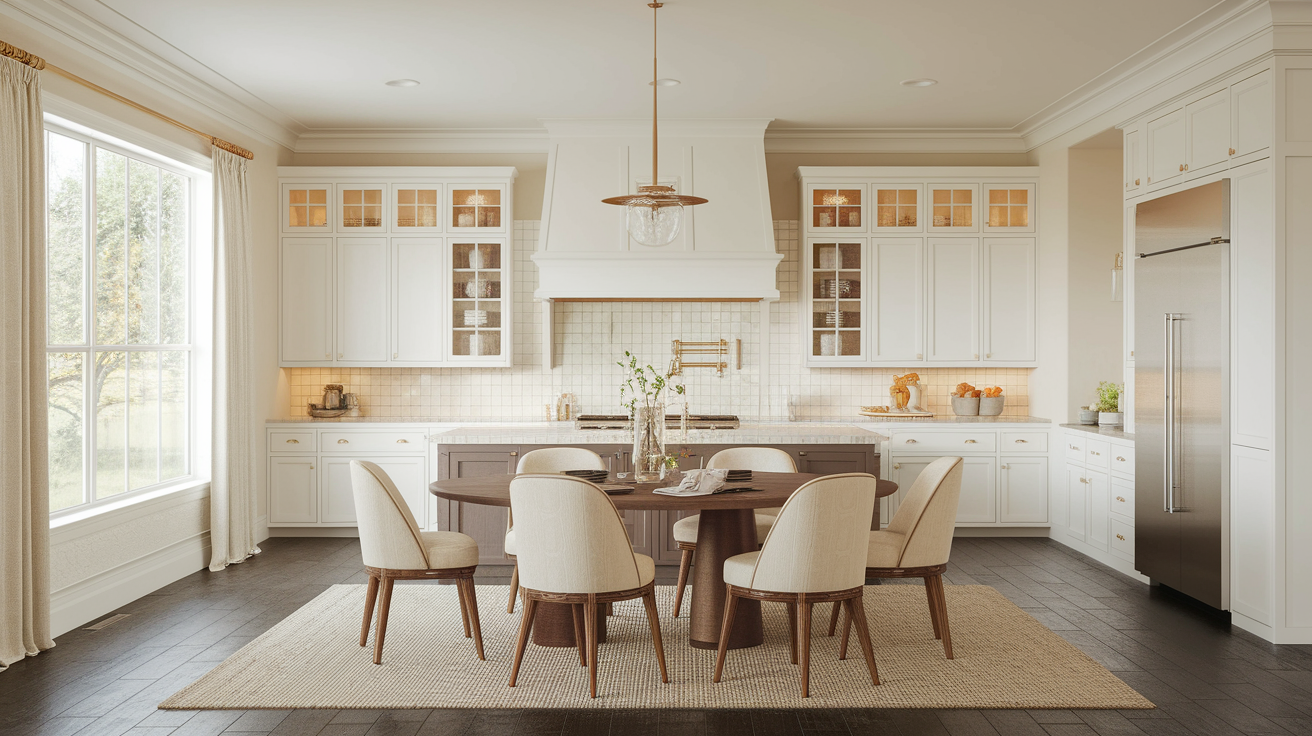
Farmhouse Table with Bench Seating
Farmhouse tables create that cozy, gathered-around-the-table feeling that makes breakfast special. The chunky legs, the rustic wood finish, the casual-but-pulled-together aesthetic—it all works beautifully in open kitchens.
Mix seating for visual interest and practical flexibility. Put a bench on one side (hello, extra seating when friends visit) and mismatched chairs on the other. This collected look feels curated and designer-approved, plus it’s more budget-friendly than buying a matching set.
You don’t need to spend $800 on a reclaimed wood farmhouse table. Big-box stores sell farmhouse-style tables for $200-300. Thrift stores often have solid wood tables that just need refinishing. I’ve even seen people create stunning farmhouse tables using pre-made legs from hardware stores attached to butcher block countertops—total cost under $150.
Position your farmhouse table perpendicular to your kitchen workspace, not parallel. This creates natural flow and prevents the table from blocking your cooking zone. Add a runner down the center, keep a bowl of fresh fruit as an edible centerpiece, and you’ve got a breakfast area that begs people to sit down and linger.
Rolling Cart Breakfast Station
This is genius-level flexibility: a rolling cart that functions as a breakfast bar when you need it and stores against the wall when you don’t. Perfect for truly tiny open kitchens where permanent furniture feels overwhelming.
Look for carts with a solid top surface (not slatted) that’s large enough for two people to eat comfortably—at least 24 inches wide. Locking wheels are non-negotiable; you don’t want your breakfast cart rolling away mid-meal. Storage shelves underneath hold coffee supplies, breakfast essentials, or even cookbooks.
Style your rolling cart as a dual-purpose piece: coffee station meets breakfast nook. The top surface is your eating area, while the shelves below organize your coffee maker, mugs, and morning necessities. When breakfast is over, roll it against the wall and reclaim your floor space.
Target, IKEA, and Amazon all sell quality rolling carts for $60-150. Choose finishes that coordinate with your kitchen—industrial metal and wood for modern farmhouse, sleek white for contemporary, warm wood tones for traditional.
Drop-Leaf or Expandable Tables
Space-saving furniture earns its keep in open kitchens where every square foot matters. Drop-leaf tables fold down to narrow console width when not in use, then expand to full dining size when you need seating for four or more.
The trick is placement. Position your drop-leaf table against a wall or even floating in your space with the leaves down. When breakfast time arrives, pull it out slightly and raise the leaves. After the meal, collapse it back down and reclaim your floor space. This flexibility is especially valuable in studio apartments or small open-concept homes where the kitchen flows directly into the living area.
Look for drop-leaf tables with storage drawers or shelves built into the base—double functionality for the win. IKEA’s INGATORP table is a budget-friendly classic that expands from 2-person to 4-person seating. Vintage drop-leaf tables from estate sales often feature better construction than modern versions and cost less than $100.
Store folding chairs nearby (more on that in a moment) so your seating expands along with your table. The goal is a breakfast area that adapts to your needs rather than permanently consuming precious square footage.
Zone-Defining Design Elements: Creating Visual Boundaries
Here’s where design magic happens. Even without walls or permanent structures, you can clearly define your breakfast area using visual cues that tell your brain “this is a distinct space.”
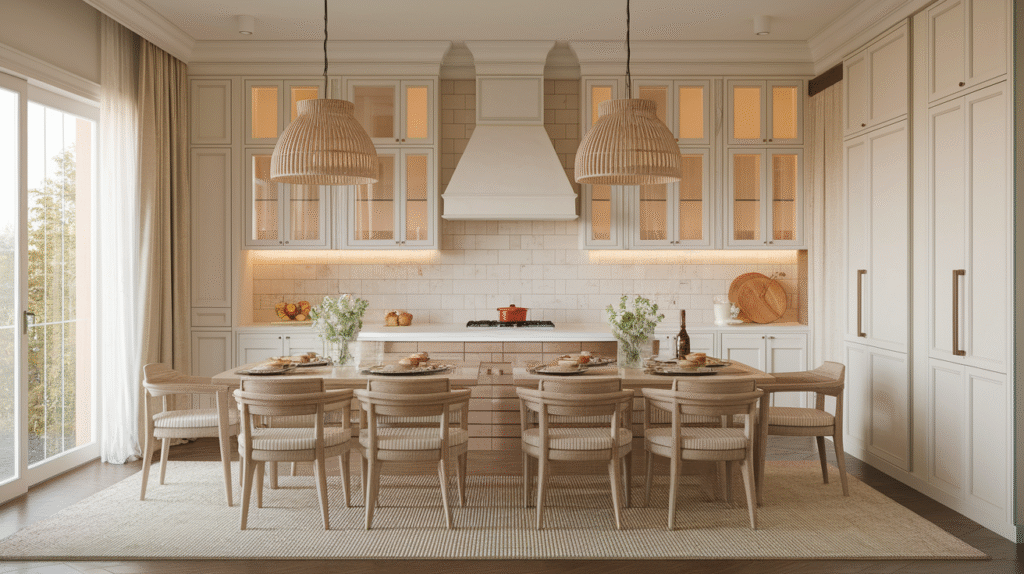
Lighting as a Zone Marker
Pendant lights are the fastest way to establish a breakfast zone. Hang a pendant (or a pair of pendants) directly over your breakfast table or bar seating, and suddenly that area reads as intentional and defined. The light draws the eye, creates an intimate atmosphere, and signals “this is the eating area” without blocking sight lines or flow.
Size matters. For a standard breakfast table, choose pendants 12-20 inches in diameter. Hang them 30-36 inches above the table surface—high enough to avoid head bumps, low enough to create that cozy, gathered feeling. For bar seating at an island, you want pendants with more vertical presence since the ceiling is higher.
Budget-friendly pendant lights that look expensive: West Elm’s sculptural options during sales, Target’s threshold line, even Amazon’s surprising selection of modern farmhouse and industrial styles. I’ve found stunning brass pendants for under $60 that look identical to $300 designer versions.
Renters can’t always install hardwired fixtures, but plug-in pendants solve this problem beautifully. Companies like IKEA and Amazon sell pendant kits with long cords and ceiling hooks—no electrician required. Alternatively, a statement floor lamp positioned near your breakfast area creates similar zone-defining impact with zero installation.
Rugs That Anchor Your Breakfast Space
Putting a rug in a kitchen sounds counterintuitive until you see how effectively it defines a breakfast zone. The rug creates a visual boundary that says “dining area starts here” while adding warmth, color, and texture to your open space.
Choose materials wisely. Natural fiber rugs (jute, sisal) are durable and hide crumbs beautifully. Low-pile synthetic rugs clean easily with a vacuum and spot cleaner. Avoid high-pile or shag rugs that trap food particles and become cleaning nightmares.
Size guidelines prevent the too-small-rug mistake: your rug should extend at least 24 inches beyond all edges of your table, allowing chairs to remain on the rug even when pulled out. For a breakfast bar with stools, the rug should extend 18-24 inches beyond the counter edge. Too-small rugs look like afterthoughts; properly sized rugs look intentional and polished.
Washable rugs are game-changers for breakfast areas. Companies like Ruggable and even Target now offer machine-washable options that handle spills without drama. Yes, they cost more upfront ($150-300 for a good-sized rug), but the stress-free maintenance pays dividends when your kid spills orange juice for the third time this week.
Pattern and color add personality without permanent commitment. A bold geometric rug energizes the space. A vintage-inspired Persian rug adds unexpected elegance. Even a simple striped rug in coordinating colors pulls the breakfast area together with minimal effort.
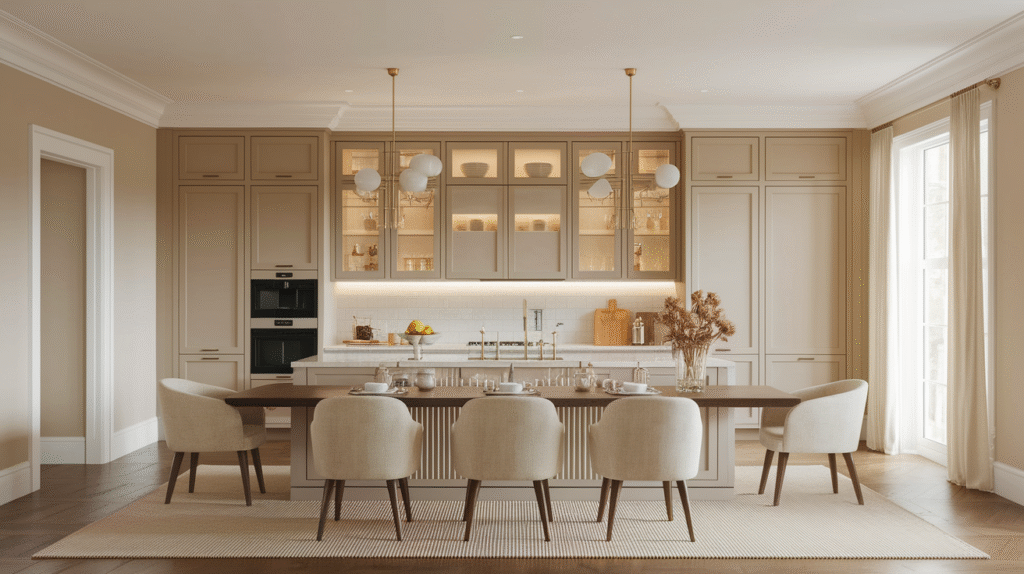
Color and Texture Differentiation
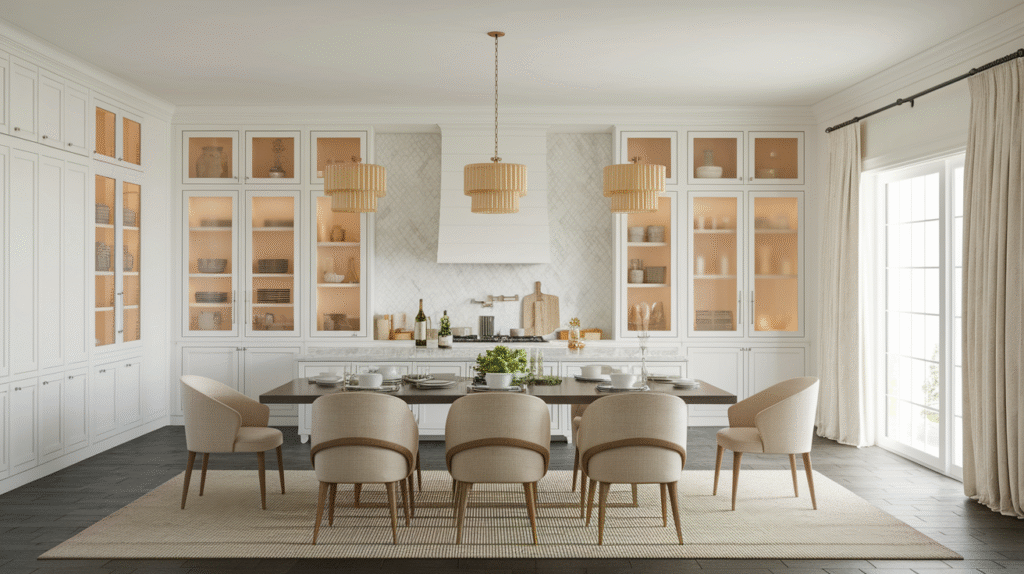
Color creates psychological boundaries just as effectively as physical walls. Paint an accent wall behind your breakfast nook in a shade that coordinates with but differs from your main kitchen color. The subtle shift signals a new zone while maintaining cohesion across your open space.
Renters, removable wallpaper is your friend. Peel-and-stick options from companies like Tempaper, Spoonflower, and even Target transform walls with zero damage. Choose patterns that add interest without overwhelming—subtle textures, tone-on-tone designs, or small-scale prints work best in breakfast nooks.
Texture layering adds dimension that makes your breakfast area feel distinct. Mix smooth surfaces (your table) with woven elements (cushions, placemats), natural materials (wood, plants), and metal accents (light fixtures, chair legs). This variety creates visual interest that draws the eye and establishes the area as its own distinct zone.
Different chair colors or cushion patterns also signal the breakfast zone effectively. If your kitchen features all-white cabinetry, introduce navy blue cushions in the breakfast nook. If your kitchen has warm wood tones, add chairs in a complementary but different finish. These subtle variations create distinction while maintaining overall cohesion.
Half-Walls, Shelving, and Low Dividers
Sometimes you need more definition than a rug or lighting provides. Low dividers create separation without sacrificing the open feel that makes your kitchen special in the first place.
Open shelving units positioned perpendicular to your kitchen cabinets establish a visual boundary while maintaining sight lines. Style the shelves with cookbooks, plants, and decorative objects that add personality to both sides. This divider serves double duty: defining your breakfast zone while providing valuable storage and display space.
Low bookcases (36 inches or shorter) separate spaces without closing them off. Position a bookcase behind your breakfast seating to create a subtle boundary between kitchen and dining. The low height preserves the open feeling while clearly delineating zones.
Plants function as natural, living dividers that cost less than furniture. A tall fiddle leaf fig or bird of paradise positioned near your breakfast area creates a soft boundary that feels organic and intentional. Group several smaller plants on a plant stand for similar effect. The greenery adds life and color while establishing your breakfast zone as a distinct area.
Console tables positioned behind seating provide both storage and clear boundaries. The table creates a physical edge to your breakfast area while offering surface space for a table lamp, a bowl for keys, or decorative objects. This works especially well when your breakfast nook backs up to your living area—the console table bridges both spaces while keeping them distinct.
Bringing It All Together: Your Perfect Breakfast Area Awaits
Creating a stunning breakfast area in your open kitchen isn’t about having unlimited space or budget. It’s about making intentional choices that define zones, add functionality, and inject personality into your home.
The strategies I’ve shared—from corner nooks that maximize every inch to freestanding furniture that moves with you, from zone-defining lighting to rugs that anchor your space—work because they’re flexible, budget-friendly, and achievable regardless of whether you rent or own.
Start with zone definition. Choose one method—a rug, pendant lighting, or strategic furniture placement—and implement it this weekend. That single change creates immediate impact and gives you a foundation to build on.
Next, select furniture that fits your space and lifestyle. A tiny corner calls for a bistro set. A generous open layout accommodates a farmhouse table. An island-centric kitchen benefits from the right bar stools. Match your furniture to your reality, not to Pinterest fantasy.
Finally, add those finishing touches that make your breakfast area feel curated: cushions that invite lingering, plants that bring life, lighting that creates ambiance. These details cost less than $50 combined but transform a functional eating space into a spot where you actually want to spend time.
Your open kitchen is already beautiful. Now it’s time to make it truly functional by carving out that dedicated breakfast area you’ve been dreaming about. Pick one idea from this list, commit to implementing it this week, and watch how quickly that undefined corner becomes your favorite spot in the entire house.
The perfect breakfast area isn’t about perfection—it’s about creating a space that works for your life, your budget, and your style. Now go claim that corner and transform your open kitchen into the functional, inviting space it was always meant to be.